Photobucket

Friday, July 29, 2011

End of the School Year Pool Party

Every year the elementary students celebrate the end of the school year with a pool party. Here are some of the pictures from this year's party.

Photobucket

Photobucket

Photobucket

Photobucket

Photobucket

Photobucket

It was a lot of fun! We had snacks, drinks, and a beautiful, sunny day. The children played in the pool and on a big treehouse, while the parents were able to relax and talk about our children.

Tuesday, July 26, 2011

Proudly Displaying Their Work

Every year, at the "end of the year celebration", the elementary students are given a chance to show off the progress they've made during the school year. The children are given 3-fold boards to decorate in their own individual styles, on which they can display the papers and artwork they are most proud of. Reading books, workbooks, and thematics folders are displayed in front of each child's board, so that parents and grandparents can easily see how much the child has achieved.

Photobucket

Photobucket

Photobucket

We don't send home much school work during the school year. When children are constantly bringing home papers, those papers are more likely to be discarded or lost. By waiting until the end of the school year to send this work home, it is easier for both the parents and teachers to assess the progress the child has made over the entire year.

Parents are welcome to come look at their child's work at anytime during the school year.

Friday, July 22, 2011

A Blast From the Past

While going through some old photographs, I found these pictures from the 2007 younger elementary field trip to Dinosaur World. Most of these children are now in Middle School.

The picture quality is not as good as some of my more recent photos, because these were taken before I had a digital camera.

Photobucket

Photobucket

Photobucket

Photobucket

Photobucket

Photobucket

Tuesday, July 12, 2011

What are Thematics?

Photobucket

The elementary students at Trilogy school have a class called "thematics", but since this is not a class name at most schools, I figured this might require a little explanation. Thematics is a mixture of history and science. It is called "thematics" because the lessons follow a certain theme. There are three main themes that are used, World History, American, History, and Biomes. Each of these subjects is followed for an entire year.

Within each main theme, there are many sub-themes. For instance, this past year was our World History year. That was divided into studies of dinosaurs (for the first and second graders), creation myths,archaeology, early man, Mesopotamia, Ancient Egypt, and Ancient Greece, and Medieval times. A study of the human body was paired with the study of mummies from Ancient Egypt.

Thematics can include reading, worksheets, and movies, but there are also many hands-on projects. Here are some of those projects from this past year:

Putting together a timeline
Photobucket

Learning how archaeologist's put together broken pots
Photobucket

Photobucket

Painting plaster models of the heads and tools of early humans
Photobucket

Model Pre-Historic Shelters
Photobucket

Photobucket

3D pop-up cards for both Mesopotamia and Egypt
Photobucket

The human body floor puzzle
Photobucket


Our director takes great pride in decorating the classrooms to go along with the thematics units we are going to be doing. Right now, she is preparing for a year of American History.

Photobucket

Wednesday, July 6, 2011

Elementary Drama

Each year, the elementary students have learned at least one play that goes along with the subjects they are studying. For the 2009-2010 school year, that play was "Rumpus in the Rainforest".

The children helped to make their costumes and scenery, as well as singing and acting in the play.

Photobucket

Photobucket

Photobucket

Photobucket

The play was then preformed for family and friends at our "end of the year" celebration. There were a few opening-night jitters before they took to the stage, but once the play started, they all did a fantastic job.

"In the Amazon Rainforest there lived a frog. This is his story. The story of a frog with an impossible dream that came true..."

Photobucket

He's a cool cat!
Photobucket


Photobucket


One of our two boa constrictors:
Photobucket

Tuesday, July 5, 2011

How Does Your Garden Grow

Organic gardening was added to the list of Middle School electives this past year.

Many of our students enjoyed going out to water the plants during their lunch hours, and it was discovered that a couple of our students have amazing green thumbs.

Photobucket

Even now, when the students are away and the garden is being neglected, it continues to produce, a testament to what a good job the students did.

Photobucket

Photobucket

Outdoor education is an important part of Trilogy's curriculum. In the past there have been trips to Marine Lab and to Jekyll Island. There has also been an on-campus outdoor survival class.

Photobucket

Saturday, July 2, 2011

Happy 4th of July

Photobucket

We're on summer break right now, enjoying time with family and preparing for an exciting new school year. Our history lessons this year will be focusing on American History, so in keeping with that theme and the holiday weekend, here is a tutorial for a craft project that children can make at home, written by one of our teachers.

Revolutionary War Toy Soldiers

Photobucket


Photobucket

Supplies:

One package of "Doll Pins", clothes pins sold at the craft store for the purpose of making dolls (the regular clothes pins we had were too thin for the bases)

One package of Doll Pin Stands, sold next to the doll pins at the craft store

Non-Toxic acrylic paint in dark blue, red, white, and black

Two 3/16-inch dowels cut into 1 1/2- inch pieces (I was able to do that with a pair of scissors)

strong, clear-drying glue

small paint brushes

black wool felt and black 1-inch pom poms for the hats

black permanent marker, for the faces


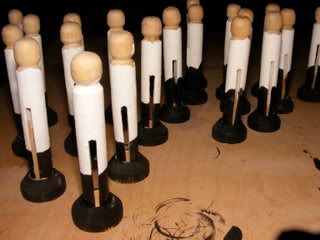
1. Glue the clothes pin into the wooden base, so it can stand up on its own.

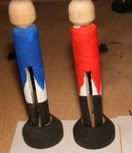
2. Using the white paint, paint around the clothes pin, from the bottom of the "neck" to half-way down the "legs". This will be the shirt and pants.Let the paint dry before proceeding to step 3.

Photobucket

3. Using the black paint, cover the base and half-way up the "leg", until the black touches the white paint, leaving no bare wood showing on the "legs". This will be the boots. I painted the boots a little taller on the half of the clothes pins that will be British soldiers and made them more rounded at the top.

Photobucket

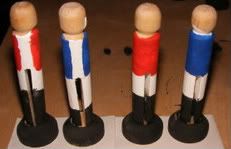
4. Paint on the jackets.

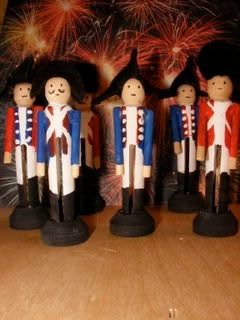
In our set there will be 10 British soldiers with red jackets and 10 American soldiers with blue jackets.

Photobucket

I painted the jackets on straight across the back first and then went back and added the points on each side of the back to make the "swallow tails" that were the fashion at the time.

Photobucket

5. Add any decorative touches to the uniforms.
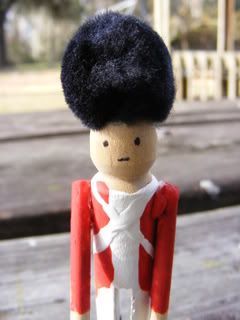
We added lapels of contrasting color and white buttons to some. Others got crossed white straps.

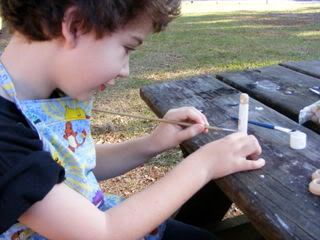
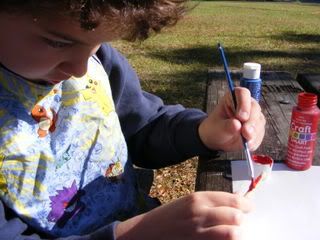
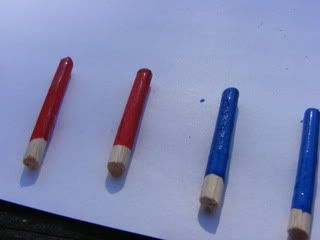
6. For the arms, sand any rough pieces off the ends of the 1 1/2 inch dowel pieces and paint two for each soldier, leaving the tip you are holding bare. The unpainted tip will be the hand. After the arm is dry, glue it to the body and let it dry over night.

Photobucket

Photobucket

7. The hats can be a variety of shapes. The easiest for the British soldiers is just a 1-inch black pom pom glued to the top of the head. The tri-corner hat is a small triangle of black felt. The other hats are made with a small circle of felt that is folded over and glued together.
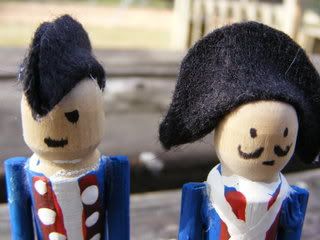
Photobucket

Photobucket

8. Draw eyes and mouth with a permanent marker.

Ready to march:

Photobucket